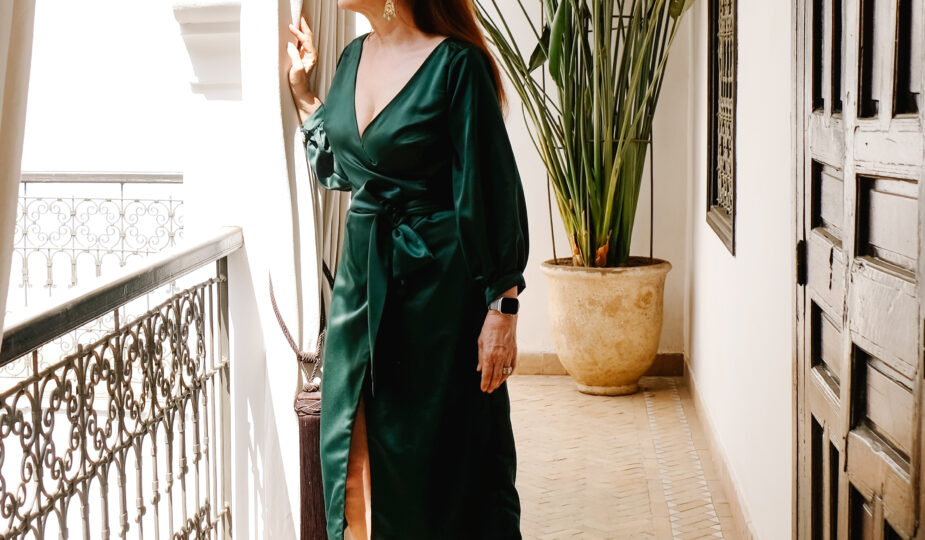
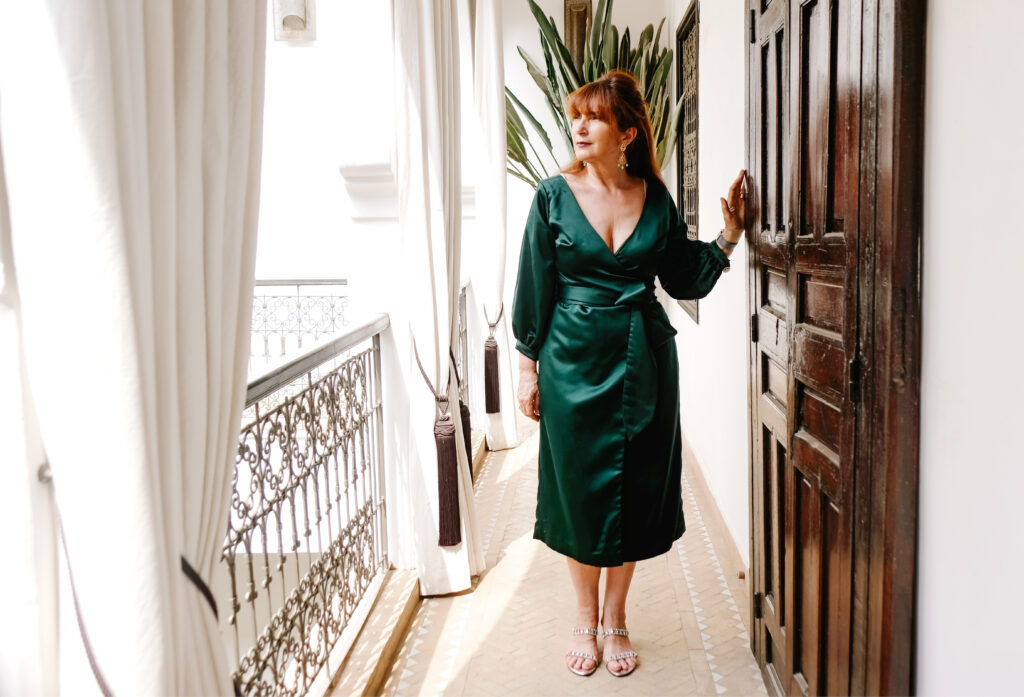
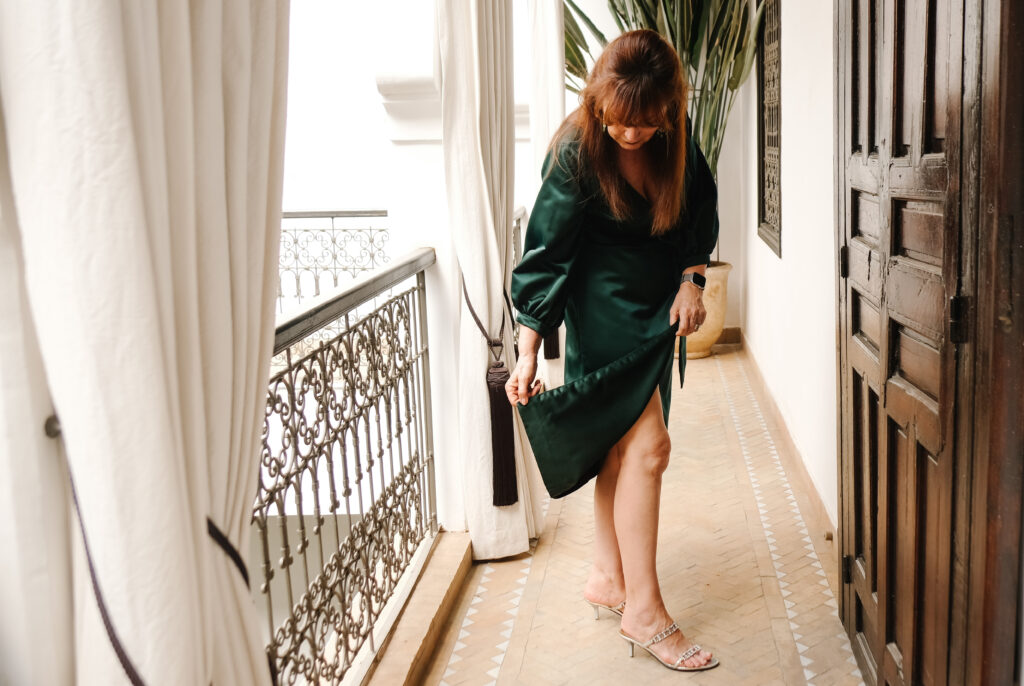
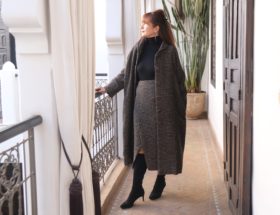
How to perfect the Aura wrap dress by Papercut Patterns. Having made this dress originally in a black linen, I decided that I needed an evening version in my wardrobe.
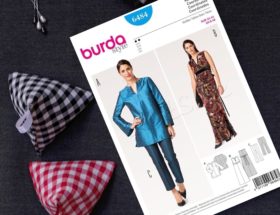
The Pattern
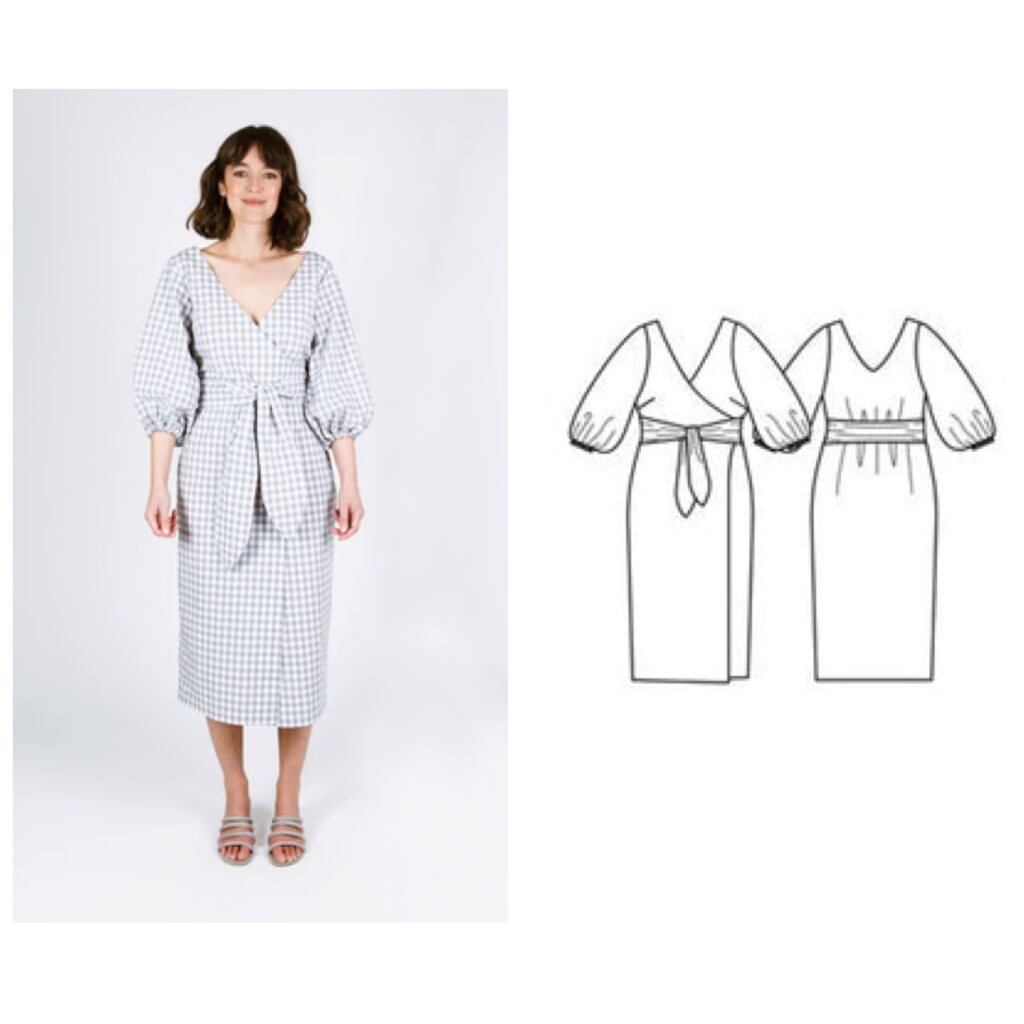
The Aura pattern features a wrap dress with bishop sleeves and a wrap skirt. Both are unlined, but have facing on the leading edges. This wrap style dress can be worn elegantly or casually, and is a statement piece that you can wear all year round. It is a dress that can be worn from day to evening, depending on the fabric.

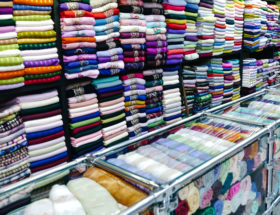
The Fabric
I used a medium weight satin to make this dress, which I purchased locally, the colour immediately caught my eye and imagination. Despite not being required by the pattern, I decided to line the dress on this occasion and used a lightweight satin to do so.
This pattern would work equally well in a cotton, lightweight wool or suiting for the cooler months. It would look stunning in silk or brocade for the evening.
Having made this dress originally in a black linen, I decided that I needed a cocktail style evening version in my wardrobe
The Make
When I decided to make this dress again for the second time, I wanted to fix the problems that bothered me in the previous make. This dress is fantastic, but I think it could be improved a little.
The dress comes together easily and relatively quickly, it is a very satisfying dress to make.
The facings are too narrow and a little mean, which is my main complaint. I would certainly broaden them next time, and I suggest you do the same if you make an unlined version. I also found the bodice to be a little too long for me, and so made adjustments.

To line the dress, I omitted the facings altogether. First, I cut out the back pattern pieces once again using the lining fabric. I then cut out the front pattern pieces once more from the face fabric. All that was then left to do once sewed together, was to bag line the dress, then join the sleeves, and serge to finish. Finally, I hand sewed the belt opening together by hand.
This means that when the dress overlaps open and move, all that you see is the main fabric on the inside, rather than the narrow facings. The dress, especially in a satin fabric, feels much better to wear when lined. The other benefit is that you do not see any seams or have to sew all the facings in place. There is also no problem with stitches showing on the surface.
Nonetheless, I made a few additional modifications.
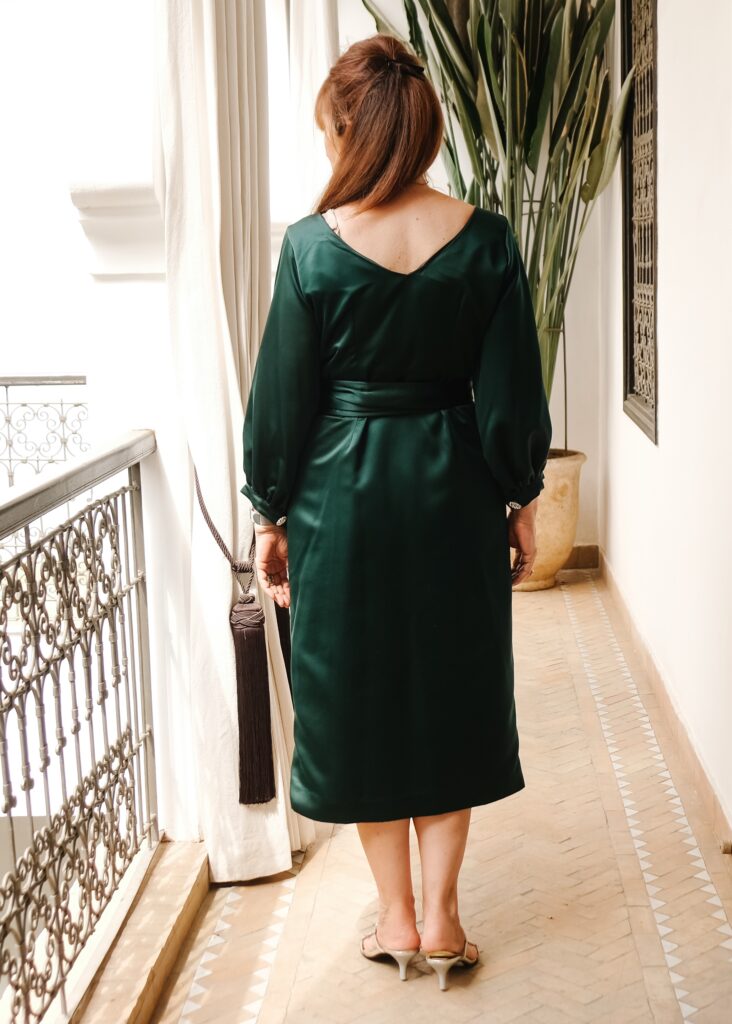
A. I widened the shoulders this time as I thought they were too narrow on the previous occasion. They had a tendency to slip down and covering a bra strap also proved to be a challenge.
B. I shortened the bodice from the top at the shoulders to prevent it from slipping.
C. Lining the dress solved the issue of the mean facings and made the satin dress more substantial.
D. The opening for the belt was widened to match the actual width of the belt by me. Squeezing a belt through a small opening is something I hate, as it causes extra bulk at the waist.
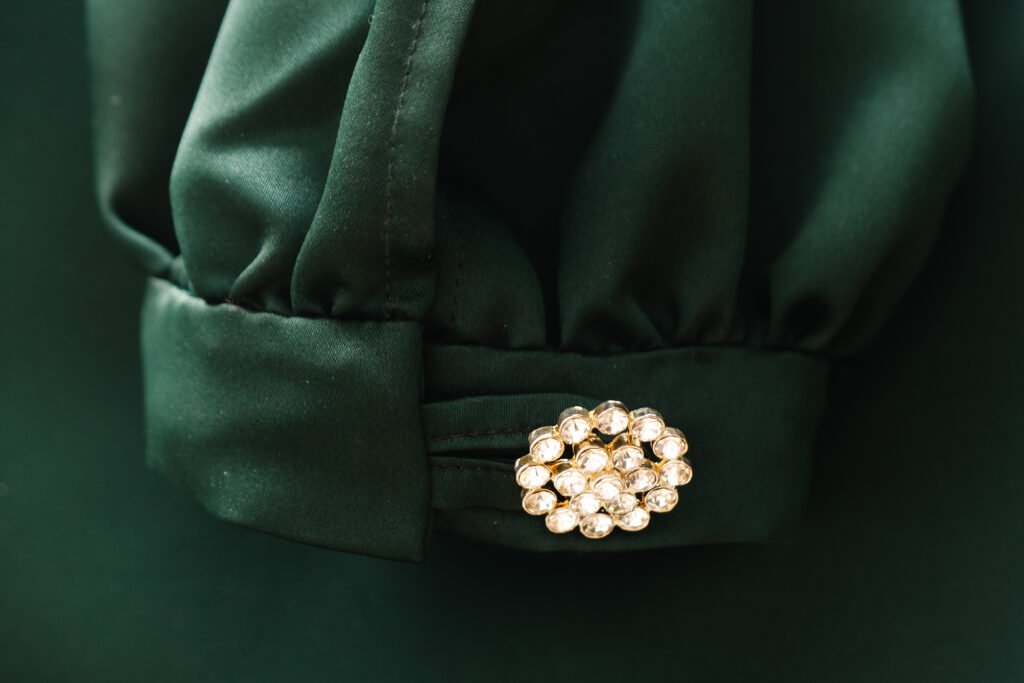
E. An elastic casing for the sleeves didn’t do justice to this stylish wrap dress, in my opinion. I therefore chose to gather the sleeves onto a narrow band, which I think looks more in keeping with the design. I incorporated diamanté buttons to give it a bit of evening glamor.
Alterations & Tips
I believe this pattern is almost perfect, but I have some suggestions for improvement.
A. The body was too long for me, causing my shoulders to slip down and the dress to open, exposing too much cleavage! This could also be because there is a V-shaped opening at the front and back of this dress. To eliminate this issue shorten the dress at the shoulders which, prevents them from slipping down and opening the bodice.
B. There is still a lot of cleavage on the display, so you may wish to add a bit more to the width and therefore narrow the opening. I forgot to do this, as you can clearly see!
C. It would be beneficial to widen the facings for the neckline and front of the dress since they are rather narrow. The bodice doesn’t pose a problem, but I would like the skirt to have more of a return facing. If you prefer, line the dress as I have done on this occasion.
D. I widened the belt opening to make it easier for the belt to lie flat and pass through.
E. Rather than fitting elastic into a case to finish the sleeves, I gathered them on a narrow sleeve band. In my opinion, this is a much more stylish dress for an occasion. However, if you want to make a more casual daytime dress in cotton, for example, then maybe an elastic-cased sleeve will give you the perfect casual look that you are after.
F. I love the bishop sleeves, but this dress could work equally well with a fitted short or 3/4 sleeve for a more casual look.
G. Finally, the tie belt is made by joining two pieces. I haven’t come across any advantages to this, so if you have sufficient fabric, I would suggest cutting it out in one piece.

The Cost
Fabric: 80 DH
Lining: 30 DH
Buttons: 6 DH
Total: 116 DH (£9.40 / $12)

Conclusion
What is it about this pattern that I love?
You cannot go wrong with a wrap dress, they are so easy to fit and wear.
The bishop sleeves create a sense of real drama. I’m happy that sleeves are finally back in style once more.
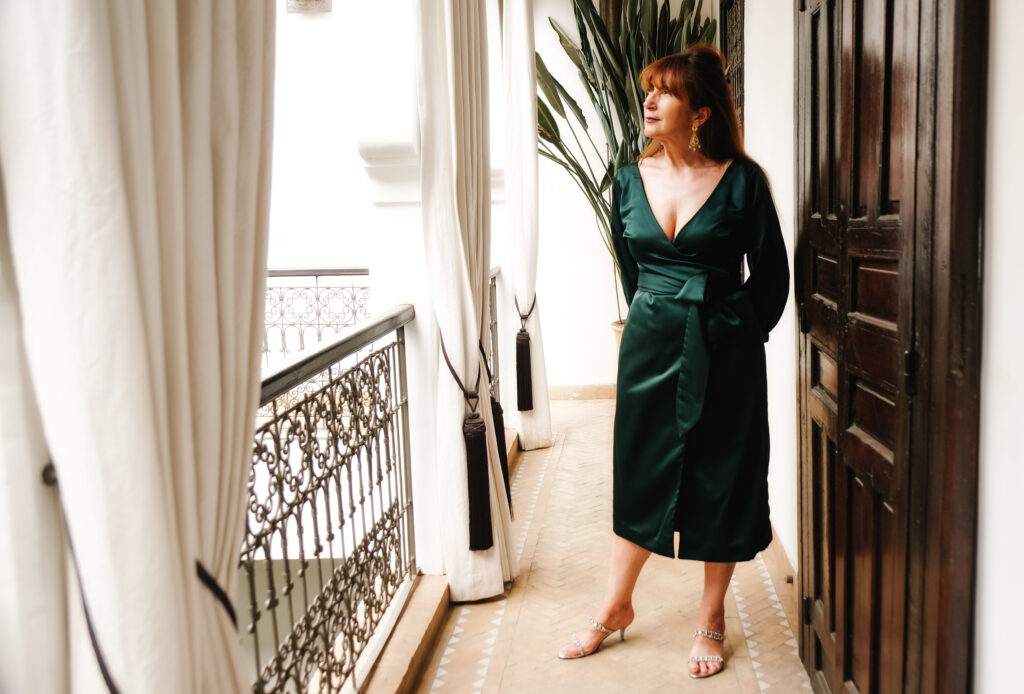
The V-back that echoes the front neckline of the dress, which I thought was an unusual detail, is something I love.
The dress’s front wraps at an asymmetric angle, which adds a stylish touch.
I love the wrap belt, as it accentuates your waistline and adds an extra detail.
Whether it’s a light weight summer cotton or a brocade for the evening, I’ll definitely be sewing this pattern again. This dress is easy to make and has a stylish outcome. I highly recommend it!


Leave a Reply